How to Run a Technical SEO Audit That Actually Fixes Your Site

Last updated: 30 July 2026
A technical SEO audit identifies broken pages, crawl errors, and indexing problems that block search visibility. The output is three deliverables: a full crawl report mapping every misconfigured URL, an indexing snapshot showing which pages Google can access, and a prioritized fix list ranked by traffic impact. Most audits fail because teams fix low-value issues first. The difference between a wasted audit and one that moves rankings comes down to which problems you tackle in what order.
Word count: 81
What You Will Have After This Audit
A completed technical SEO audit produces three concrete outputs: a full crawl report showing every broken or misconfigured URL, an indexing health snapshot confirming which pages Google can actually see, and a prioritized fix list ordered by impact so your team works on the right problems first.
Those three deliverables matter in sequence. The crawl report surfaces structural problems, the indexing snapshot tells you whether those problems are already costing you visibility, and the fix list turns both into a ranked queue rather than a sprawling spreadsheet nobody acts on.
One number worth keeping in mind: SEOscore's site analysis data puts the average website at just 62% on technical SEO health. Most sites have meaningful gaps before a single content decision gets made.
Auditing the technical layer first pays off for a specific reason. If you optimize content on pages that have crawl blocks, redirect chains, or duplicate canonicals underneath them, you compound the problem. You spend time and budget on pages that search engines may never properly index. Running the technical layer first gives you a clean foundation so content work actually sticks.
One honest caveat: the audit itself does not fix anything. The fix list is only as useful as the process you build around it.
Before You Start: What You Need

To run a technical SEO audit, you need three tools (Google Search Console, Screaming Frog, and PageSpeed Insights), a verified GSC property with crawl access to the live domain, and roughly two to four hours depending on site size.
Tools
Google Search Console is the required starting point. It surfaces crawl errors, manual actions, and index coverage gaps that no third-party crawler can replicate, because the data comes directly from Google's own pipeline.
Screaming Frog SEO Spider handles the on-site crawl. The free tier crawls up to 500 URLs, which covers most small business sites and landing page stacks without a license. Larger sites above 500 pages will need the paid version at £259/year, or you will hit the cap mid-crawl and get an incomplete picture. If your site runs 2,000+ URLs and you are working with the free tier, plan to crawl a subdirectory or a specific section rather than the whole domain.
PageSpeed Insights rounds out the toolkit. It pulls both lab data and real-world field data from the Chrome User Experience Report, so you are not just testing your own connection speed. Only 33% of websites pass Core Web Vitals thresholds, which means most sites have at least one fixable performance issue before the audit even begins.
Access and Permissions
Before you crawl anything, confirm three things:
- Your GSC property is verified and you have at least "Owner" or "Full User" access. Read-only access will not let you submit sitemaps or request indexing later.
- You can crawl the live domain directly. Screaming Frog needs to reach the same URLs Google sees, not a CDN-cached or geo-redirected version.
- If the site sits behind HTTP authentication (a staging environment, a password-protected preview, or a .htaccess lock), configure Screaming Frog's authentication settings under Configuration > Authentication before starting. Crawling a staging URL and treating the results as production data is a common mistake that produces misleading redirect chains and missing canonical tags.
One edge case worth flagging: if the site uses JavaScript-heavy rendering (React, Next.js, Vue), Screaming Frog's default crawl mode will not execute JS. Enable the built-in Chromium renderer under Configuration > Spider > Rendering, which significantly slows the crawl. For large JS-rendered sites, budget extra time or crawl in sections.
Step 1: Map What Google Can and Cannot See
Start by establishing a clear inventory of which URLs Google has indexed, which it has excluded, and which it cannot reach at all. Pull the Coverage report in Google Search Console, sort by status, and treat every "Excluded" URL as a question worth answering before you move further. Without this baseline, every fix you make downstream is aimed at a target you have not confirmed exists.
Pull the Coverage Report First
Open Google Search Console, navigate to Indexing > Pages, and filter by each status category in turn: Indexed, Not indexed, and the specific exclusion reasons underneath. Pay close attention to "Crawled, currently not indexed" and "Discovered, currently not indexed" as separate buckets. They signal different problems. The first means Google visited the page and chose not to index it. The second means it has not even crawled it yet, often because of crawl budget pressure or a weak internal link structure.
The numbers here can be surprising. Digitalapplied's 2026 audit guide notes that indexation gaps are among the most frequently missed issues in routine audits, with many sites carrying a meaningful percentage of their URL inventory in an excluded state without anyone on the team realizing it.
Cross-Reference Sitemap Submissions Against Crawl Timestamps
Once you have the Coverage data, pull your sitemap submission history from the Sitemaps report in Search Console. Compare the "Last read" date on each submitted sitemap against the "Last crawl" timestamps visible in the Coverage detail for individual URLs.
A sitemap submitted more than 90 days ago with no re-submission, combined with URLs showing crawl dates older than 60 days, is a reliable indicator of stale entries. Pages that were removed or redirected but never cleaned from the sitemap create noise that dilutes crawl budget across your live inventory. Remove them.
The trade-off is worth naming. Aggressively pruning your sitemap can temporarily reduce crawl frequency on pages you want indexed, if Googlebot was using the sitemap as its primary discovery path. Audit your internal linking structure in parallel so that every page you care about has at least one crawlable path to it that does not depend on the sitemap alone.
Flag the Tags and Rules That Are Hiding Your Pages
With the Coverage inventory in hand, cross-reference it against three specific technical controls:
- Noindex tags. A page appearing in the "Excluded" bucket with the reason "Excluded by 'noindex' tag" is being actively suppressed. Check whether that tag is intentional. CMS plugins and staging-to-production migrations are the two most common sources of accidental noindex tags shipping to live URLs.
- Canonical mismatches. If a page's self-declared canonical points to a different URL than the one Google is crawling, Google will typically index the canonical target and ignore the page you are looking at. This is correct behavior when you set it intentionally, and a silent ranking problem when you did not.
- Robots.txt blocks. A URL blocked in robots.txt can still appear in the index if it has external links pointing to it, but Google will not crawl the page content. You end up with a URL in the index that Google cannot evaluate properly.
Spoclearn's technical SEO audit checklist for 2026 identifies canonical configuration errors and robots.txt conflicts as two of the top five crawlability issues found during structured audits, which tracks with what most practitioners encounter in practice.
Run all three checks against your Coverage export before moving to any performance or structured data work. Fixing a page's speed means nothing if Google cannot see the page at all.
Step 2: Crawl the Site and Audit On-Page Structure

Before you can fix anything, you need an accurate picture of what your site actually serves to a crawler. Open Screaming Frog, set the user-agent to Googlebot Desktop, and dial the crawl speed down to 2-5 requests per second for shared hosting or staging environments. That combination gives you data that reflects real-world crawl conditions without spiking your server load or triggering rate-limiting that cuts the crawl short.
Configure Before You Crawl
Two settings matter before you hit start. First, make sure JavaScript rendering is enabled if your site uses a JS framework, otherwise Screaming Frog will miss any content injected client-side. Second, set the crawl limit to zero (unlimited) and point it at your canonical domain, not a staging URL. A crawl of the wrong environment is worse than no crawl at all because it creates false confidence.
The seoClarity technical audit checklist puts redirect chain depth among the top five crawl-budget killers, and the fix is straightforward once you have the data: export all URLs and filter by status code, starting with 4xx errors. A 404 on a page with inbound links is lost equity. Fix those first, then move to redirect chains.
Work the Status Code Export
Sort the full URL export by HTTP status code. Fix 4xx errors before touching anything else. Each broken URL that carries backlinks or internal links is bleeding authority to nowhere. After 4xx cleanup, filter for 3xx responses and trace any chain longer than two hops. A chain structured as 301 to 301 to 200 adds latency and dilutes link equity at each hop. Collapse those to a single direct redirect.
The trade-off here is time. On a site with 50,000+ URLs, triaging status codes manually is slow, and automated bulk-fix tools can introduce new redirect errors if the mapping file has inconsistencies. For large sites, fix in batches of 200-300 URLs and re-crawl each batch before moving to the next. This approach breaks down when a CMS auto-generates redirects on slug changes, because new chains can appear faster than you resolve old ones.
On-Page Signals in the Bulk Export
Once status codes are clean, pull the on-page tab. Sort title tags by pixel width and flag anything above 580px or below 200px. Both extremes cause problems: long titles get truncated in SERPs, short ones signal thin content. Check the H1 column for duplicates across URLs, a common issue on e-commerce sites where category filters generate near-identical pages. Missing meta descriptions should be exported as a separate list and prioritized by organic traffic, highest-traffic pages first.
These checks are mechanical, but they surface real problems fast. A site with 300 duplicate H1s and 150 missing meta descriptions is not a content problem, it is a template problem, and fixing the template fixes all instances at once.
Step 3: Measure Core Web Vitals and Page Speed

Start by running PageSpeed Insights on your three highest-traffic URLs. Record the field data scores for LCP (target: under 2.5 seconds), INP (under 200 milliseconds), and CLS (under 0.1). These three metrics are Google's primary page experience signals, and failing any one of them can suppress rankings even when your content and links are strong. Lab data gives you a reproducible baseline; field data tells you what real users actually experience.
Start with Your Three Most-Visited Pages
Pull your top three URLs from Google Analytics or Search Console, sorted by sessions. Run each in PageSpeed Insights using both mobile and desktop mode. Log every score in a spreadsheet before you touch anything. The numbers shift after fixes, and you need a before/after record to prove the work mattered.
One limitation worth flagging: PageSpeed Insights lab data simulates a single device profile on a throttled connection. If your traffic skews toward high-end mobile or fast broadband, the lab scores will look worse than what your actual users experience. Use field data (the "Discover what your real users are experiencing" section) as your primary benchmark, and treat lab scores as a diagnostic tool rather than a pass/fail grade.
Read LCP, INP, and CLS as Separate Problems
Each Core Web Vitals metric points to a different part of your stack.
A slow LCP (above 2.5 seconds) almost always traces back to one of four causes: a large unoptimized hero image, render-blocking CSS or JavaScript, a slow server response time (TTFB above 800ms), or a missing preload hint for the largest above-the-fold element. Check the "Opportunities" section in PageSpeed Insights for the specific culprit on each URL.
A high INP (above 200ms) means the page is slow to respond to user input, typically because of heavy JavaScript execution on the main thread. Long tasks above 50ms are the usual cause. The fix usually involves code-splitting, deferring non-critical scripts, or replacing a bloated third-party widget with a lighter alternative.
A CLS score above 0.1 means elements are shifting visibly after the page loads. The most common causes are images without explicit width and height attributes, late-loading ads or embeds, and web fonts that swap after render. Setting explicit dimensions on every image and using font-display: optional or font-display: swap resolves most CLS issues without a full redesign.
Prioritize by Traffic, Not by Score
A page scoring 45 on mobile PageSpeed that gets 10,000 sessions per month deserves more attention than a page scoring 30 that gets 200. Sort your PageSpeed results by organic traffic volume before you assign fixes to your development queue. The goal is maximum ranking impact per hour of engineering time, not a perfect score on every URL.
One honest constraint: Core Web Vitals field data updates in the Chrome User Experience Report on a 28-day rolling basis. After you deploy a fix, you will not see the field data move for up to four weeks. Lab scores update immediately, so use those to confirm the fix worked technically, then wait for the field data to catch up before reporting results to stakeholders.
Step 4: Check Structured Data and Schema Markup
Structured data does not directly boost rankings, but it controls whether your pages qualify for rich results in SERPs. A product page with valid schema can show star ratings, price, and availability directly in the search result. A recipe page without schema shows a plain blue link. The difference in click-through rate between those two presentations is measurable.
Validate with Google's Rich Results Test
Run your key page types through Google's Rich Results Test. Focus on the page types that qualify for rich results in your vertical: Product, Article, FAQ, HowTo, Review, and LocalBusiness are the most commonly implemented. The tool flags both errors (which disqualify the page from rich results) and warnings (which reduce eligibility but do not block it entirely).
Fix errors before warnings. A single missing required property, such as price on a Product schema or author on an Article schema, will disqualify the entire markup block. Warnings on optional properties can wait.
Check for Schema Conflicts and Stale Markup
Two issues appear frequently in audits and are easy to miss. First, duplicate schema blocks on the same page, often caused by a theme injecting one block and a plugin injecting another, can produce conflicting signals. Google will typically pick one and ignore the other, but you lose control over which one. Second, schema markup that references outdated information (a discontinued product, an old business address, a past event date) can trigger manual review flags in Search Console under the "Enhancements" section.
Pull the Enhancements report in Search Console and check for any schema types showing errors or warnings at scale. A single template error can affect thousands of URLs simultaneously on large sites.
Step 5: Audit Internal Linking and Site Architecture

Internal links do two things: they pass authority between pages, and they tell crawlers which pages matter most. A page with zero internal links pointing to it is effectively invisible to Googlebot unless it appears in your sitemap or has external backlinks. Most sites have at least a handful of these orphaned pages, and they are almost always unintentional.
Find Orphaned Pages
In Screaming Frog, run a full crawl and then cross-reference the crawled URL list against your sitemap. Any URL that appears in the sitemap but has zero internal links pointing to it is an orphan. Export that list and sort by organic traffic. Orphaned pages that receive traffic despite having no internal links are usually surviving on external backlinks alone, and they are fragile. Add at least two contextually relevant internal links to each one.
The counter-case: some pages are intentionally isolated. Standalone landing pages for paid campaigns, for example, are often kept out of the main navigation to control the user flow. Before you add internal links to every orphan, confirm the page's purpose. Adding a nav link to a PPC landing page can dilute the conversion focus you built into it.
Audit Link Depth from the Homepage
Pages buried more than three clicks from the homepage receive less crawl attention and tend to accumulate less internal link equity. In Screaming Frog, check the "Crawl Depth" column in the URL export. Any page at depth 4 or greater that you want to rank should be brought closer to the surface, either by adding it to a relevant category page, a hub page, or a contextual link from a high-traffic article.
Flat site architecture (most pages reachable within two clicks) is the goal for sites under 10,000 URLs. For larger sites, a clear hub-and-spoke structure, where topic hubs link to supporting pages and supporting pages link back to the hub, keeps crawl depth manageable without requiring a full restructure.
Step 6: Build the Prioritized Fix List
A technical SEO audit produces value only when the findings translate into a fix list that someone actually works through. The raw exports from Screaming Frog and Search Console are not a fix list. They are a data dump. Your job at this stage is to convert that data into a ranked queue with clear ownership and estimated effort.
Score Each Issue by Impact and Effort
Use a simple two-axis framework. Impact is the estimated effect on crawlability, indexability, or ranking if the issue is fixed. Effort is the engineering or content time required to fix it. High-impact, low-effort fixes go first. Low-impact, high-effort fixes go last or get cut entirely.
Concrete examples of high-impact, low-effort fixes:
- Removing accidental noindex tags from indexable pages (5 minutes per URL, immediate indexing benefit)
- Collapsing a 301-to-301 redirect chain to a single hop (one server config change, crawl budget recovered)
- Adding missing
altattributes to images on high-traffic pages (template fix, accessibility and image search benefit) - Submitting an updated sitemap after removing stale URLs (one GSC action, cleaner crawl signal)
Concrete examples of high-effort fixes that are still worth scheduling:
- Migrating a JS-rendered site to server-side rendering for full crawlability (weeks of engineering, significant long-term indexing improvement)
- Restructuring URL taxonomy to reduce crawl depth across 5,000+ product pages (requires redirects, internal link updates, and sitemap rebuild)
Assign Ownership Before You Share the List
A fix list with no owner is a wish list. Before you share the document with your team, assign each item to a specific person or role: developer, content editor, or SEO. Include the tool or file they need to access and a one-line description of the fix. Vague instructions produce vague results.
One practical constraint: developers are usually the bottleneck. Batch all server-side fixes (redirect chains, canonical tags, robots.txt edits, schema errors) into a single sprint rather than trickling them in one at a time. Context-switching between SEO fixes and feature work is expensive, and batching reduces the overhead on both sides.
Frequently Asked Questions
How long does a technical SEO audit take?
For a site under 500 pages, expect two to four hours from first crawl to a completed fix list. Sites between 500 and 5,000 pages typically take one to two full days, including time to interpret the data and write up findings. Sites above 5,000 pages often require a phased approach, auditing by section or template type rather than the entire domain at once, which can stretch the process to a week or more depending on team size.
How often should you run a technical SEO audit?
A full audit once per quarter is a reasonable baseline for most sites. High-velocity sites that publish frequently, run regular A/B tests, or deploy code updates weekly should run a lighter crawl monthly and reserve the full audit for quarterly reviews. The trigger for an unscheduled audit is any significant traffic drop that does not correlate with a known algorithm update.
Do you need paid tools to run a technical SEO audit?
No. Google Search Console and PageSpeed Insights are free and cover indexing health and Core Web Vitals without any cost. Screaming Frog's free tier handles sites up to 500 URLs. The paid version of Screaming Frog (£259/year as of 2026) becomes necessary for larger sites, but the free tier is sufficient for most small business audits. Enterprise tools like Semrush, Ahrefs, or Botify add convenience and scale but are not required to run a thorough audit.
What is the difference between a technical SEO audit and a content audit?
A technical SEO audit examines the infrastructure layer: crawlability, indexability, site speed, structured data, and internal linking. A content audit examines what is on the pages: keyword targeting, topical coverage, content quality, and engagement metrics. The two audits are complementary. Running a technical audit first makes sense because content improvements on pages with crawl or indexing problems will not produce ranking gains until the technical issues are resolved.
What should you fix first after a technical SEO audit?
Start with anything that blocks indexing outright: accidental noindex tags, robots.txt blocks on pages you want ranked, and canonical tags pointing to the wrong URL. These issues prevent Google from seeing your pages at all, so no other optimization matters until they are resolved. After that, address 4xx errors on pages with backlinks, then redirect chains, then Core Web Vitals on your highest-traffic pages.
If you want a second set of eyes on your findings or need help turning a crawl export into a fix list your team will actually use, visit Seorav to see how they approach technical audits for sites of different sizes and complexity.
Keep reading
Ranking in Google's AI Search: The Deterministic Signals That Actually Move the Needle
Learn how do you rank in SGE with the three signals Google's AI uses to cite sources: schema markup, entity salience, and structured factual claims.

Why AI Ignores Your Content (And How to Fix It)
Learn how to avoid AI content that gets ignored by LLMs. Covers RAG retrieval signals, schema, entity salience, and an answer-first structure checklist.
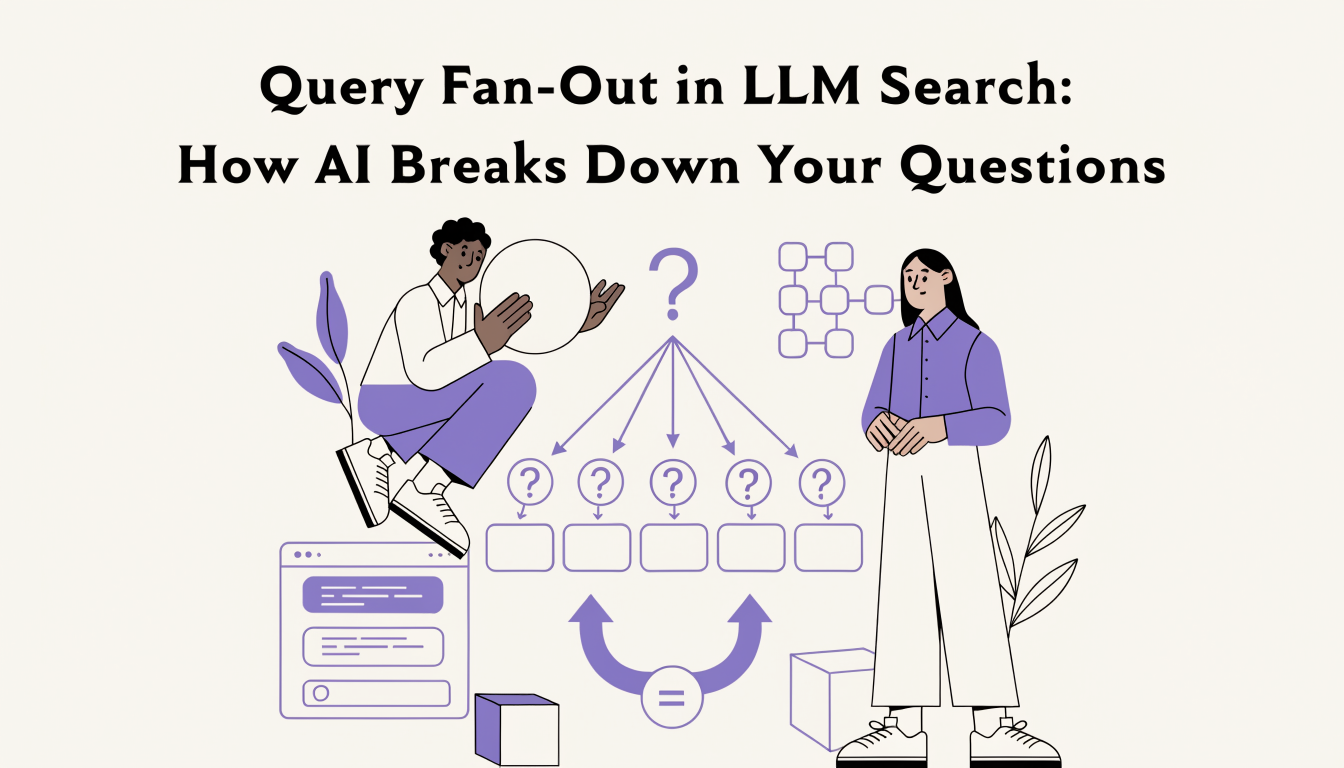
Query Fan-Out in LLM Search: How AI Breaks Down Your Questions
Learn what query fan-out in LLM search is, how AI splits your prompt into 3-8 sub-queries, and how to structure content to win more citation passes.